This blog site has no longer been updated. Please visit my website below:

http://yanzhangphotography.com

where you can find my latest images and publications.

Please also visit me @ Instrgram yan.zhang.australia

Introduction

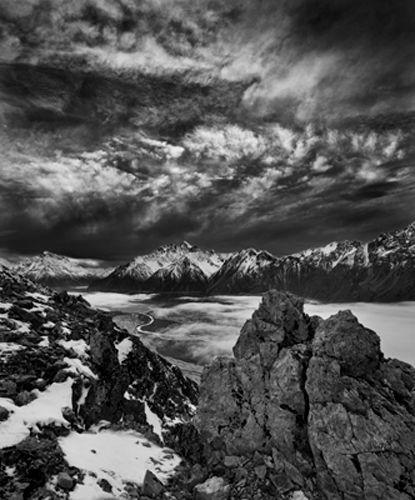
2014 has been a very important year for me: Since I made up my mind to go beyond the plains, I have explored the Southern Alps of New Zealand two more times after I completed my Aoraki/Mt Cook Alpine Guides’ Mountain Experience Course (MEC, see link). In July 2014, Mark – my guide and friend, and I climbed Mount Cook Range. During that trip, I was able to make couple of nice pictures. The following pictures are probably the very first serious landscape photographs made from this place, because most of current pictures of Southern Alps were taken as snapshots by climbers.

Beyond the Plains: Touching the Sky

Beyond the Plains: Touching the Sky


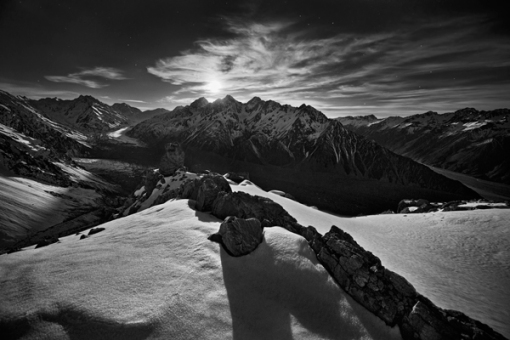
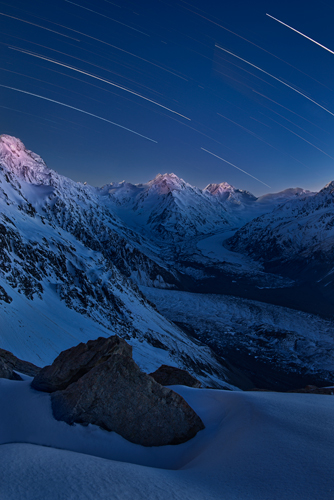
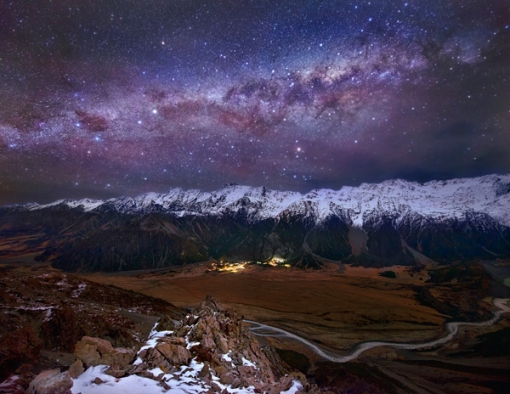
The Above photo was made on 8 July 2014, around 3.30am after moon set. From a location of 1600 meters high, we witnessed the most stunning Milky Way I have ever seen. The lights down the mountain came from Aoraki/Mt Cook Village, while the curve line in the valley was the river from Muller Glacier Lake on the very right side outside this image.

Over Tasman Valley

Over Tasman Valley

Planning

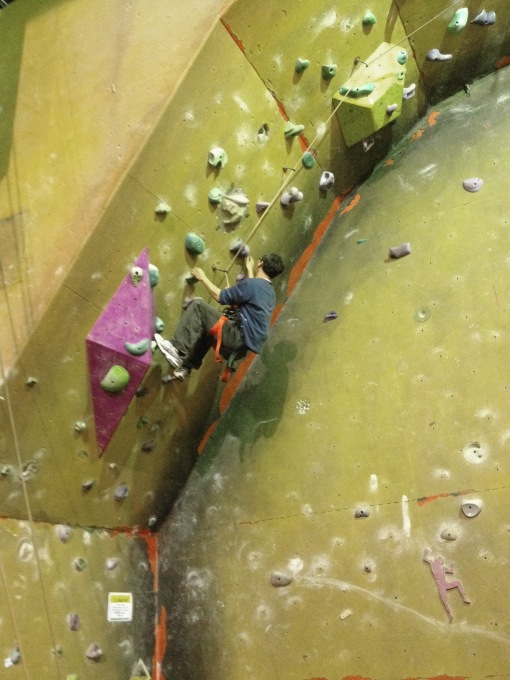
Soon after I completed our Mount Cook Range trip with Mark, I started to plan a new mountain trip in November 2014. As an experienced mountaineer, Mark suggested that we climbed Darren Mountain near Milford Sound. From the high mountain ridge of Darren Mountain, we would get stunning high views over Milford Sound and surrounding mountain scenes. Since then, for three months, I had trained myself hard in order to enhance my physical fitness as well as climbing techniques.

Indoor Rock Climb Training

Indoor Rock Climb Training

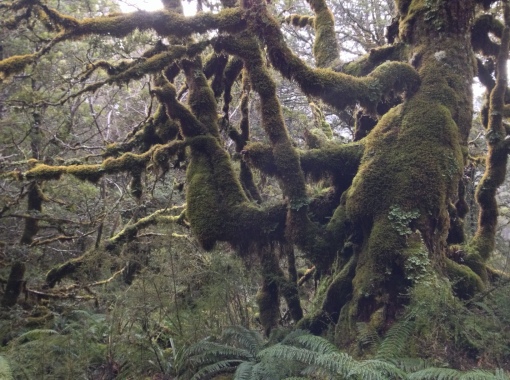
Yun and I arrived in Te Anau on 1 November. According to our plan, we would first undertake a 2-day backpack trip to Lake Mckenzie before our Darren Mountain climb. However, after we arrived in Te Anau, it was heavily raining. By ignoring such bad weather, we still went on our backpack trip to Lake McKenzie (12KM from the Divide on the Routeburn Track) under the worst weather condition: heavy rains, strong wind and floods. It was an unforgettable backpack experience, though I was not able to take any pictures at Lake McKenzie.

Scenery along the Routeburn Track

Scenery along the Routeburn Track

After we got back to Te Anau, the weather had not been improved, and we were told that a major snow storm was being just across the most parts of the Southern Alps. One day later, I got a message from Mark to inform me that there was too much snow in Darren Mountain area which implied a high risk of avalanche. So we both agreed that we had to change our original plan. Mark suggested that the Ball Ridge in Mount Cook region would be a good alternative because from there we could gain a very unique glacier view and the avalanche risk was not that high according to avalanche broadcast.
Climbing the Ball Ridge

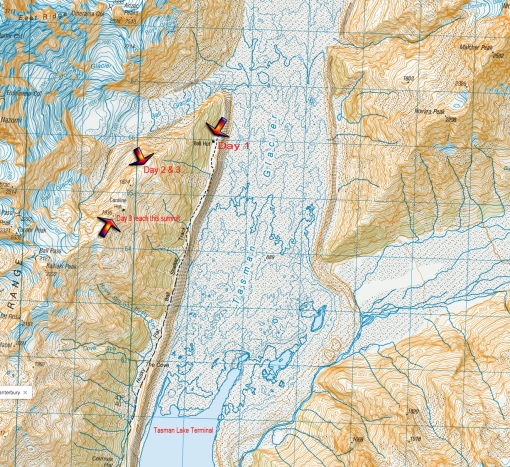
Ball Ridge is a mountain ridge on the other end of Mount Cook Range, its base is located near the terminal of glacier Tasman Lake. We quickly rescheduled our climb plan to Ball Ridge: On the first day, we would hike to the Ball Hut from the trail head of Tasman River, stayed in the hut for overnight. Then the second day we would climb to Ball Ridge with 700 meters vertical height, and camped along the ridge for two nights. Our climb path is showed as in the following topomap.

Topomap of Ball Ridge

Topomap of Ball Ridge

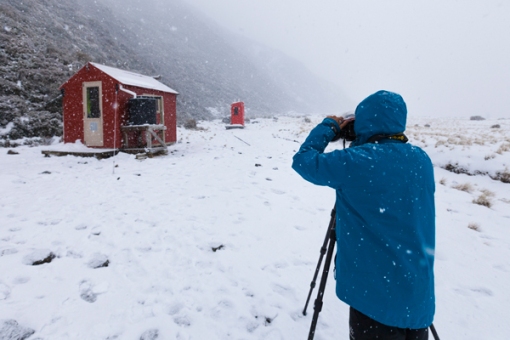
Ball Hut is a standard hut in the Aoraki/Mt Cook Area with three bunks, toilet, radio and water supply. We arrived in the hut around 4pm on 5 November 2014, luckily, no one was there. I found that although the space was small, the hut was quite cosy and convenient. The weather looked good after sunset, and we were hoping to start our climb in the next early morning. But unexpectedly, it turned out that it had an overnight snow fall in the area and the next day morning it was still snowing.

Ball Hut

Ball Hut

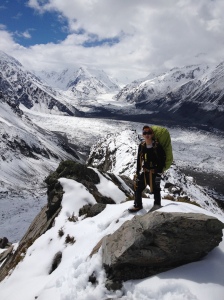
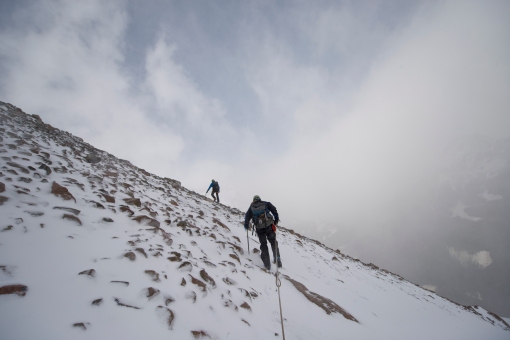
By 11am in the morning of 6 November 2014, when the snowfall became a bit light, we decided to start our climb. This was a harder climb compared to my previous two alps experiences in January and July respectively. The climb started with a steep but relatively clear track first, then after about 200 meter vertical height, it got very steep and most of the parts were covered by deep snow, and I had to use my ice ax to secure myself for each move. Finally, after six hours hard climb, we reached the top of Ball Ridge around 5pm. For the very first time, I got so close to such a stunning glacier landscape.

Climbing Ball Ridge

Climbing Ball Ridge

53 Hours

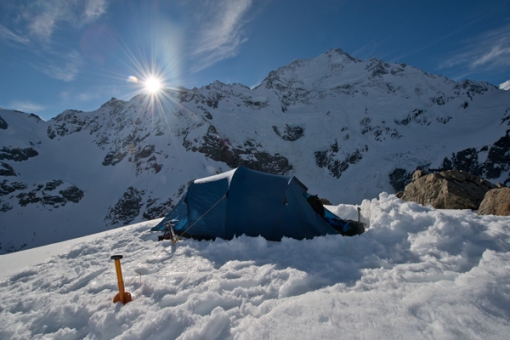
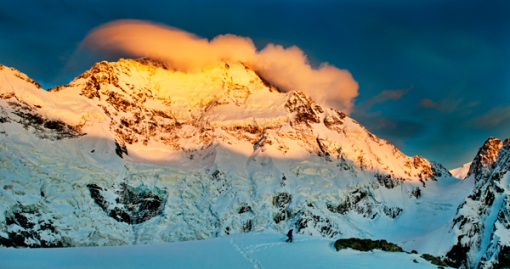
Mark found a flat spot for our campsite. We had to pitch our tent on the snow as the ground surface was covered by 50cm thick snow. We were surrounded by glaciers and mountain peaks. The Carolina Face of Mount Cook summit was just a hundred meters away from us, separated by a huge glacier gulley. This location was quite different from the one that we were climbed in July 2014, where we could see Aoraki/Mount Cook Village from 1000 meters above. Here, we were completely isolated from civilizations.

Mount Cook Summit - Caroline Face

Mount Cook Summit – Caroline Face

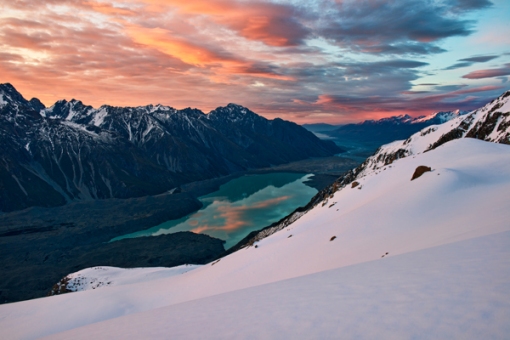
Although surrounded by ice and snow, surprisingly, we did feel extreme cold during the night, because there was no much wind. During our stay on the Ball Ridge, the weather was nice and we were able to explore the place thoroughly and made some interesting pictures. Again, as n our July trip, I believe that some of our pictures probably were the very first serious landscape images made from this location.

Ball Ridge: A Moment of Grace

Ball Ridge: A Moment of Grace

Moonlight over Alpine Glaciers

Moonlight over Alpine Glaciers

Mark devoted a lot of his time to shoot around Cook Mount summit. He told me that as a mountaineer, this place had some special meaning to him. One morning, when the first sunlight hit the summit, Mark run towards his position for taking pictures, and I captured his action.

The Photographer

The Photographer

7 November 2014 was a sunny day. After finishing our morning shooting, Mark suggested to climb a 1936 m summit near Caroline Hut. At beginning I was not so sure if I could make it because the snow was quite deep on the hills. Mark checked the condition, and ensured me it was safe. It was a delightful climb, we made to the summit in the mid day, and got back to our campsite at 2pm. Altogether we spent 5 hours for this climb.

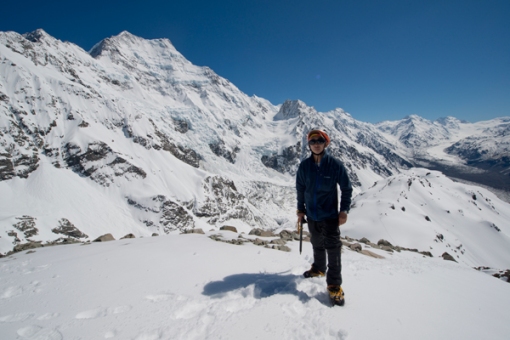
On the Summit

On the Summit

It was early summer in south hemisphere. But no summer on the southern alps of New Zealand. The scenery of Ball Ridge was amazed me in every minute. Now I understand why people want to climb mountains. From this experience, for me, mountains have been beyond my photography subjects, more fundamentally, they give me complete freedoms, though they also impose various risks.

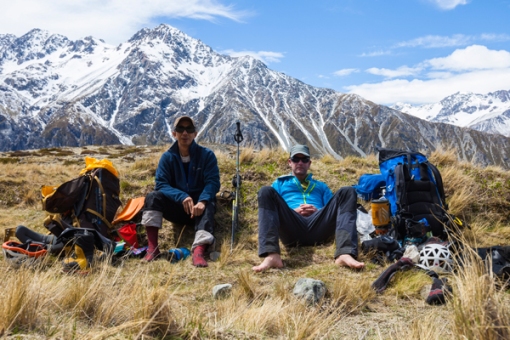
Mark and I got back to Ball Hut.

Mark and I got back to Ball Hut.

At 9:30am of 8 November, we started to descend. Physically, climbing down was not as hard as climbing up. But it had definitely more potentials to fall. I had to pay extra attention for almost each step down until we finally reached the flat base. We got back to Ball Hut around 2pm, and had a late lunch there. Then we continued hiking out. By the time we came back to Unwin Hut at 5pm, Yun had been already anxiously waiting for us for the whole day, as she thought we would come back in the morning.

As Time Passes By...

As Time Passes By…

Final Remarks

Climbing Ball Ridge was a milestone for my mountaineering experience. On the one hand, this trip greatly increased my confidence in the Southern Alps. During this trip, Mark has given me so much encouragement. He is not only an excellent mountaineer and photographer, but also a trustful guide, partner and friend. Each time with him, I have learned so many things. Now I think I have built good knowledge and foundation for climbing mountains. On the other hand, my mountain experience also made me understand potential risks in high mountains. To continue my journey, I should clearly know my limits – both physically and mentally. By the end, mountain landscape photography is such a wonderful field for that I can only follow my passion whenever my capacity allows.

More images made from this trip can be viewed from here.
http://yanzhangphotography.com

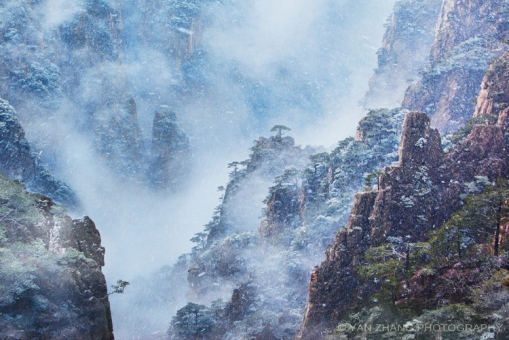
“Mount Hallelujah” created in movie Avatar has its origin from three famous Chinese mountain regions: Huangshan, Zhangjiajie and Guilin. The image I will talk about in this article was made from Huangshan.

Mount Hallelujah

Mount Hallelujah

About the Location

Huangshan (黄山), also called Yellow Mountains in English, is a mountain range in southern Anhui (安徽)Province. For thousands of years Huangshan has been one of the most famous Chinese mountain regions, becoming a symbolic icon for Chinese poetry and artwork, especially Chinese ink painting. Nowadays, with its rich culture origin and incredibly beautiful landscape scenery, Huangshan has attracted countless tourists and artists every year.

Regarding its landscape, Huangshan offers three unique features that are rarely seen altogether anywhere else in the world: the vigor of the Huangshan pine trees growing straight out of the rocks, unusual rock formations, and the Sea of Clouds.

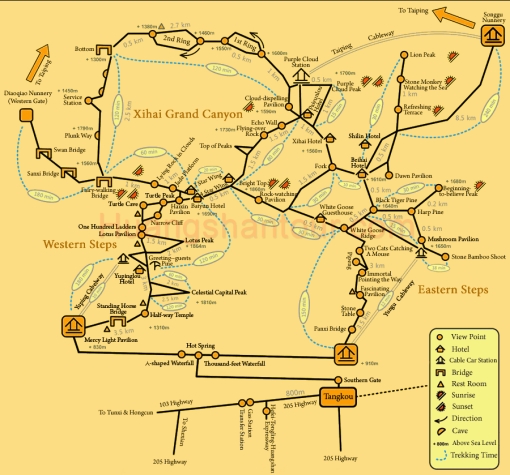
Access to Huangshan is generally not so difficult, and going by train or by bus is the most common way to get there. However, people should note that Huangshan is a large mountain area, trekking in the mountains requires certain physical fitness, especially for photographers carrying heavy camera gears. The above map shows the main trekking paths and trails in the mountains.
There are a few decent hotels in the mountains, which provide great convenience for people who want to stay there for days.

Huangshan-Trekking-Map

Photography in Huangshan

I started exploring Huangshan for landscape photography in 2008. Since then I have been to Huangshan six times. Taking nice pictures of Huangshan is everyone’s desire. Nevertheless, making outstanding Huangshan images is definitely challenging – you will need a lot of things coming together at the right time in the right place.

Generally, it is not very hard to find a location in Huangshan with a good composition for shooting photos. Locations for sunrise and sunset shootings are usually different, although this is not always true. Keep in mind, however, that to be creative, one does need a lot of effort to explore Huangshan thoroughly. For instance, Xihai Grand Canyon (西海大峡谷, also called the Grand Canyon of West Sea in English) (see the above trekking map) is a huge area in Huangshan, and there are infinite photography opportunities inside the canyon once the light conditions are right. In English, Xihai means West Sea.

During my previous five visits, I was unlucky and did not witness any impressive sunrises or sunsets. Most of the times the weather was rainy, heavily foggy, or just cloudless and sunny without any interesting skyscape features.

In January 2013, I decided to visit Huangshan during the deep winter season, and stayed there for six days. I thought this would give me more opportunities to encounter some special weather conditions. Indeed, Huangshan’s winter was simply beautiful, snowfalls were frequent, and the scenery was very different from the other seasons.

The Picture

This photo was taken in the afternoon on 22 January 2013, in Cloud-dispelling Pavilion (排云楼), the entry of Xihai Grand Canyon. It was a cold and overcast afternoon, and there was no sign that any impressive light was going to appear during the sunset time. But I still decided to go out to shoot something. Cloud-dispelling Pavilion was my favorite location for afternoon shooting because it faced west and from there one could view the vast open field of Xihai Grand Canyon.

When I arrived at Cloud-dispelling Pavilion, two photographers from Hong Kong were already there, waiting for the sunset. I joined them and set up my tripod and camera with a composition that I felt comfortable with for the shot. Since Cloud-dispelling Pavilion was a classical shooting location for Xihai Grand Canyon sunset, most people would use a wide-angle lens to shoot. But this time, I decided to use my Canon telephoto lens 70-200mm f/2.8L IS to try a different perspective.

After waiting 40 minutes, we saw no sign of any impressive afternoon light, instead, a strong snowstorm came suddenly. It was increasingly windy and a lot of hard snowflakes hit our faces and cameras. The two Hong Kong photographers could not stand such snowstorm, they packed up quickly and left.

Indeed, it was a difficult moment. But I clearly saw that an incredibly beautiful scene of Xihai Grand Canyon was appearing before me. I just started to shoot without any hesitation. My shooting lasted about 30 minutes until the snowstorm gradually ceased. By the time I left Cloud-dispelling Pavilion, I knew I had captured some dramatic images of Huangshan that rarely seen before.

Processing

Processing this image was quite straightforward. I first opened the raw file in Camera Raw 6.7, made White Balance adjustment towards a bit more bluish because I felt this was consistent with what I saw in the reality. I also made minimal adjustment by increasing both Clarity and Vibrancy to 12. After finishing these adjustments, I then loaded this file into Photoshop CS5.

In Photoshop CS5, the most effective method I used for enhancing my images was TK Luminosity Mask technique, by which I could locally adjust the colors, contrast, brightness and details on different tones of pixels. For this image, I mainly focused on various areas with mid-tones, and used TK luminosity masks to extract more details and increase the contrasts of the left side mountain walls, then used Light tone mask to make those snow flakes pop up.
After these adjustments, I then increased the overall image Vibrance to 10 and Saturation to 12 (I never increased Saturation over 15).

I saved the image to psd format including all adjustment layers so that I could make improvement later easily if necessary. Depending on how to display the image in a final form, I usually used different methods to sharpen the image and produce jpeg file. For instance, to produce a web display image with the longest size of 1200 pixels, I usually used Unsharp Mask, with Amount of 140, Radius 5, then Fade Unsharp Mask to 85.

Outcome

I was very satisfactory with the final image. Since it was published on 1X, it has become one of my most popular images in my 1X gallery. It won 1X Curator’s Choice and was selected in 1X 2013 Yearbook Passion. More recently, this image has received “Highly commended mentions” in the category “mountain Landscape in the 24th Memorial Maria Lusia International Mountain and Nature Photography Competition.


Introduction


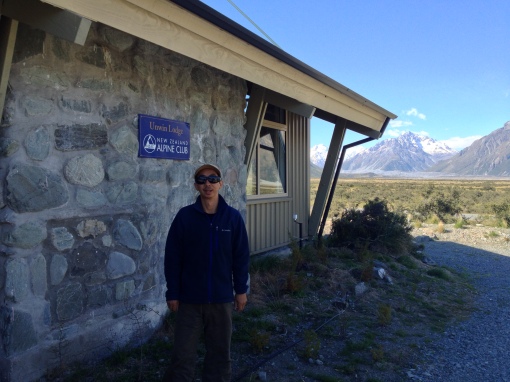
In July 2013, our family had holidays in the South Island, New Zealand. During our visit to Mt Cook, we were stuck there for two days due to a severe snowstorm: roads were closed, all trails became inaccessible, and we couldn’t do anything.


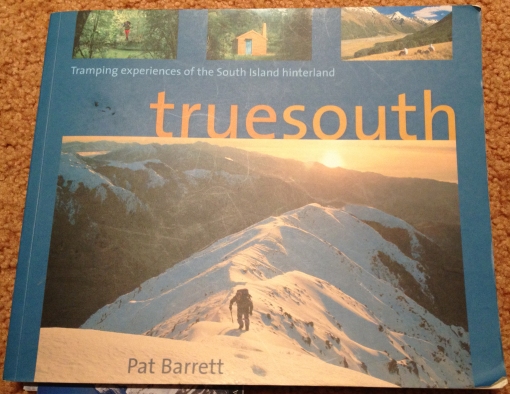
In Alpine Lodge, I picked up Pat Barrett’s book “True South” and read through it in two days. Eventually, this book gave me completely new insights about New Zealand mountains, especially the Southern Alps, and also significantly revised my photography journey from then.

Pat Barrett's True South

Pat Barrett’s True South


I was fascinated by New Zealand Southern Alps and simply wanted to make mountainous images from there. But I knew this was not simple at all, as I never had any Alps mountaineering experience before. As a starting point, the only way that I can achieve my goal is to learn Alps mountaineering knowledge and skills from very beginning.


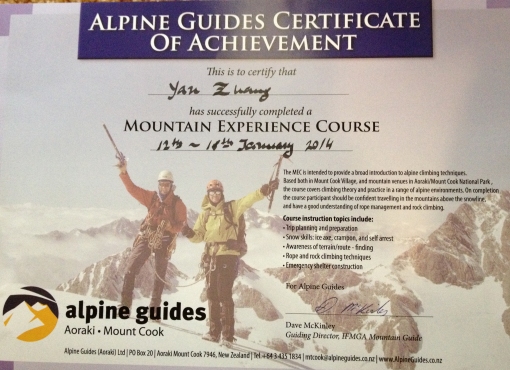
During 12 –18 January 2014, I participated in Aoraki/Mt Cook Alpine Guides’ Mountain Experience Course (MEC). MEC is an introduction course designated for people who want to explore Alps with essential mountaineering skills.


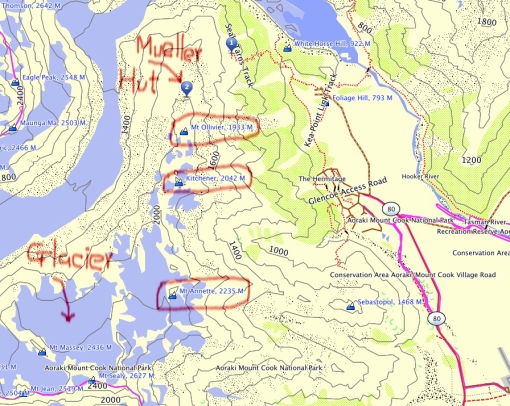
Mueller Hut – MEC training base


The course started in the afternoon of 12 January 2014. In the morning 13 January 2014, we departed from Unwin Hut – New Zealand Alpine Club’s base camp, started to hike towards Mueller Hut.


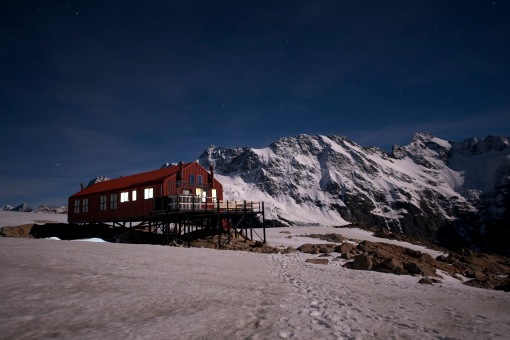
Mueller Hut is one of the earliest Alpine huts in New Zealand. It has been built 5 times through out the years. The first hut was built in 1914.


At 1800 metres on the Sealy Range (nearly half as high as Aoraki/Mt Cook’s summit), the view from the hut is a 360-degree panorama of glaciers, ice cliffs, vertical rock faces and New Zealand’s highest peaks. From a tourist viewpoint, it is a great site for hearing and viewing ice falls, alpine sunrises and equally unforgettable sunsets. The climb to the hut through alpine scrub, herb fields and scree slopes is an achievement in itself, or the start of further opportunities for the more experienced.

Sealy Range Topo Map.

Sealy Range Topo Map.


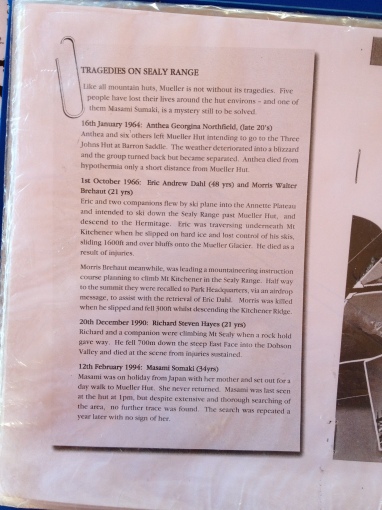
However, from a mountaineering standpoint, Sealy Range, where the Mueller Hut located, has been viewed as a rather risk region like most Alpine areas. Since 1964, 5 people died in this area and the last tragedy happened in 1994 when a 34 yo Japanese woman took a day walk to Mueller Hut but never returned.

Tragedies happened in Sealy Range

Tragedies happened on Sealy Range.

As Mueller Hut is surrounded by Glaciers and various mountain peaks, it has been used as one of the mountaineering training bases operated by the Alpine Guides at Aoraki/Mt Cook.

Our Alpine training then started from Mueller Hut. Our MEC consisted of just three people: our guide Italian mountaineer Alessandro Beber (28 yo), Tom Witt from South Australia (21 yo) and myself (51 yo).


It took us 4 hours from the car park hiking to Mueller Hut, while each of us carried a heavy backpack, including all mountaineering gears (ice axe, crampons, helmet, etc), sleeping bag, 5 days foods, etc.. In addition to these essential stuff, I had to carry extra 3.6 kg for camera, lens, tripod, and batteries in my backpack. This added to 25 kg of my backpack weight, which had exceeded my previous 18 kg backpack record for long distance hiking.

Mueller Hut.

Mueller Hut.


Walking on the Edges


On the first day when we arrived in Mueller Hut, Alessandro took Tom and me to a nearby mountain that one slope was covered by ice. We were trained essential skills such as glacier walking using ice axe, self-arrest, and rope techniques.


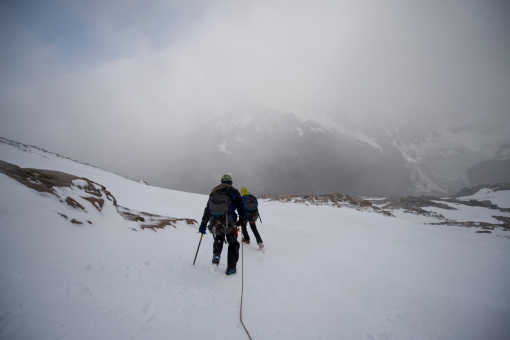
The next day we encountered an extremely bad weather that snowstorm came with 80-90 km/h wind speed. Our goal was to get to Mt Annette (2235 m height), for that we had to cross several glacier slopes, which was very challenging for me. Both Tom and I fell down couple of times on glacier slopes, but we were able to stop our falls using self-arrest techniques that we just learnt the day before.

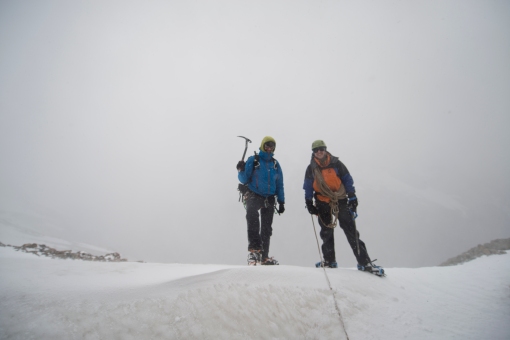
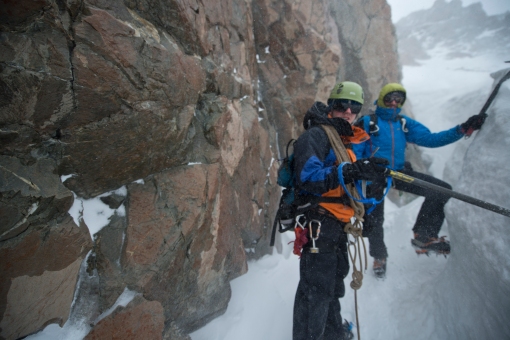
Alessandro and Tom.

Alessandro and Tom.

Heading to the Summit.

Heading to the Summit.


Climbing to the Summits


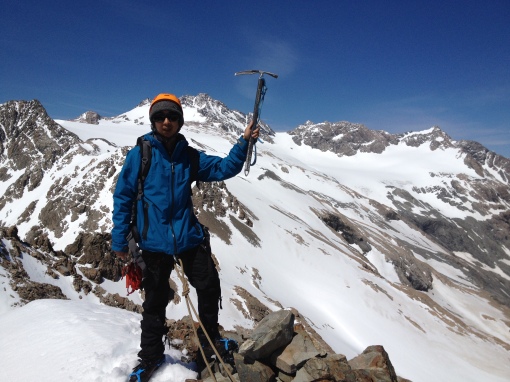
During our MEC training in Mueller Hut, we had been able to climb three mountain summits: Mount Ollivier (1933 m), Mount Kitchener (2042 m) and Mount Annette (2235 m), while to get to the last two summits, there were involved extensive glacier slope crossing.

Beyond the Plains.

Beyond the Plains.

Yan on the Summit of Mt Kitchener.

Yan on the Summit of Mt Kitchener.


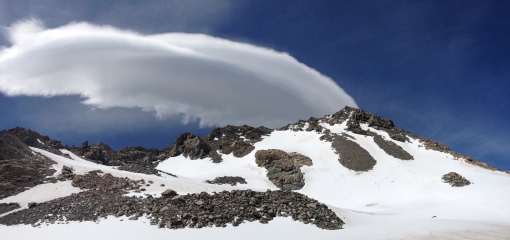
The weather in Alpine regions could change suddenly. On 15 January, on our way back from the summit of Mt Kitchener, we saw a huge lentic cloud was forming. Alessandro told us that strong wind would be coming soon. Indeed, by the time we arrived at Mueller Hut, the weather dramatically changed, the wind speed had increased to almost 100 km/h.

Alessandro and Tom

Alessandro and Tom

Alessandro and Tom

Alessandro and Tom

Lentic cloud was forming.

Lentic cloud was forming.


Some Facts


Mueller Hut is at 1800 m altitude. The elevation gain from Aoraki/Mt Cook Village to Mueller Hut is about 1000 m, while the hiking distance is just about 5 km. So it is a very steep walk. The first part of the route consists of many steep stairs, walking with heavy backpack or/and under strong wind could be difficult. The second part of the route consists of scree, snow ground, etc., no marked trails, only having some poles to indicating the direction. But these poles will become invisible in winter due to thick snow coverage.


Mueller Hut provides rain water and gas for visitors. However, going to Mueller Hut in winter is not generally easy. All trails and marks will be covered by thick layer of snow and avalanche risk does exist. It is recommended that only experienced trampers or with mountain guide companions should go to Mueller Hut in winter.


Due to its Alpine nature, weather around Sealy Range may change dramatically all year around. Wind speed is generally high. Once the wind speed reaches 65 km/h, it is considered to be risk to hike along mountain ridges in this area. During our three-day stay in Mueller Hut, we have witnessed a few sudden changes of the weather, and the wind speed once reached to about 100 km/h.


Final Words

Back to Unwin  - NZ Alpine Club Hut.

Back to Unwin – NZ Alpine Club Hut.


This Mountain Experience Course has provided me important mountaineering knowledge and skills, especially for traveling in the mountains above the snowline. I think I have established essential self confidence for extensively exploring New Zealand in the future: from Sea to Summit. More concrete photography plans targeting New Zealand Southern Alps are being on the way based on this great experience.

Yan's MEC Certificate

Yan’s MEC Certificate.


Check out my photographs from this trip in my website gallery:
New Zealand Southern Alps (2014).


After a long time preparation, our trip to Eastern Sierra was finally executed and successfully completed. In this blog, I will describe my personal experience for this winter backpacking activity and provide some information and summary that people may find useful for undertaking winter backpacking in a similar environment.


Our Goal and Original Plan


Our goal is to go to Minaret Lake (elevation 9800 feet, elevation gain 2200 feet from Devils Postpile trailhead ), camp there for a few nights, and make photographs in that area. Minaret Lake is a lake in the Ritter Range, a subrange of the Sierra Nevada, in California. It is located in extreme northeastern Madera County, within the Ansel Adams Wilderness of the Inyo National Forest. It has a unique photographic feature, especially in winter.


Our original plan was as follows:
(1) On 30 October 2013, after picking me up by my team members from San Francisco International Airport at 12pm, we directly drive to the trailhead at Devils Postpile Ranger Station, Devils Postpile National Monument, Mammoth, CA, and camp one night there;
(2) Then next day, starting from the trailhead at Devils Postpile, alone Minaret Lake trail, we hike 8 miles to reach Minaret Lake, which has elevation 9800 feet;
(3) Camping three nights (31 October, 1 – 2 November) at Minaret Lake, then explore and make photographs around that area;
(4) On 3 November, we come back to the trailhead of Devils Postpile first, and then drive back to Santa Cruz.


The Actual Trip


30 October 2013


At 10:45am, my flight UA870 arrived in San Francisco International Airport on time. About 12:00pm, my team members picked up me from the airport. After simply re-arranging my luggage, we started our journey to Eastern Sierra.


Due to a two-day snowfall just prior to 30 October, as well as an early winter arrival, the access roads – the Tioga Road and Minaret Summit Road, towards the Devils Postpile Trailhead, were all closed. Our original plan had to be changed.


Following Jon (our team member and guide)’s suggestion, we arrived at Mono Lake at 8:00pm and had camped there on the fist night.


31 October 2013


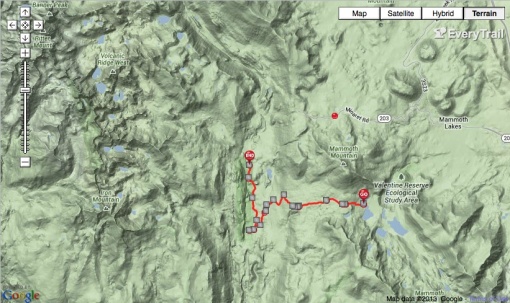
Our new plan was to get to Horseshoe Lake park area, starting from there, hiking 8 miles (12.8 km) along the Mammoth Pass to reach the Devils Postpile trailhead first. See below Map 1.

Map 1: Red line indicates the trail via Mammoth Pass from Horseshoe Lake park area to Devils Postpile, 8 miles.

Map 1: Red line indicates the trail via Mammoth Pass from Horseshoe Lake park area to Devils Postpile, 8 miles (12.8 km).


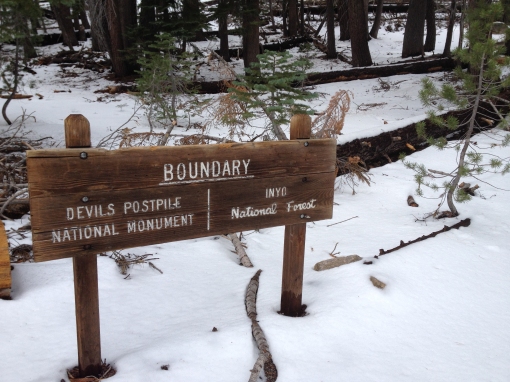
Starting at 11:00am at Horseshoe park area, we hiked along the Mammoth Pass towards Devils Postpile. Most parts of the trail had been covered by more than one-foot thick snow, which made our progress quite slow. Around 5:00pm, we reached Devils Postpile. We continued hiking further 40 minutes, stopped at the Boundary of Devils Postpile National Monument and INYO National Forest (see below picture), and set up our camps there.

Reaching the Boundary.

Reaching the Boundary.


1 November 2013


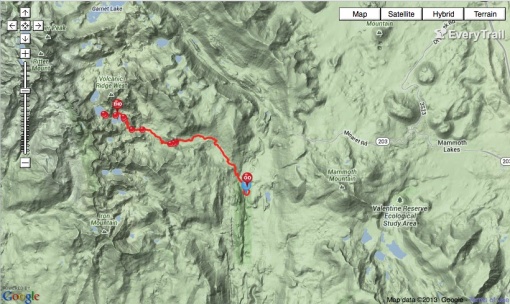
Next day, after finishing morning shooting at Devils Postpile, around 10:00am we continued our journey, along the Minaret Lake trail which was about 8 miles (12.8 km) long (see below Map 2).

Map 2: The red line indicates the trail from Devils Postpile to Minaret Lake, 8 miles (12.8 km).

Map 2: The red line indicates the trail from Devils Postpile to Minaret Lake, 8 miles (12.8 km).


Like the previous day, most parts of the trail were covered by snow, some parts the snow was over one-foot thick. Hiking was all the way up-hill, sometimes the trail was quite steep and slippery. With the elevation increased, our progress was slower. We arrived at the Minaret Lake around 6:00pm. We made some evening and night photographs at the Minaret Lake area.

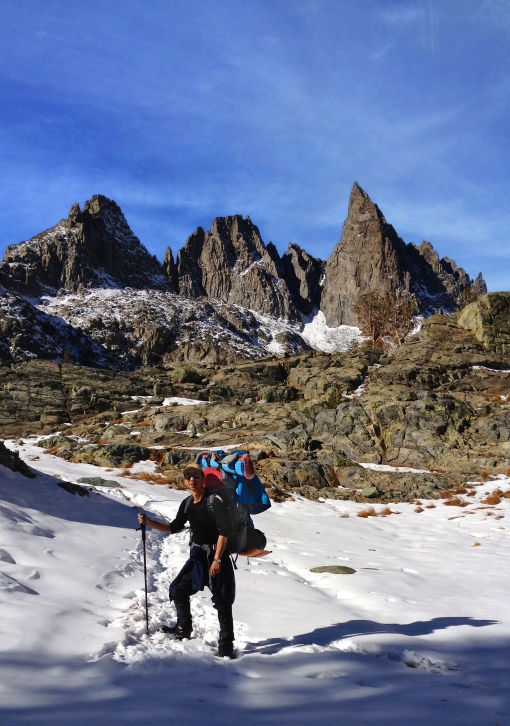
Under the Minaret Mountain Summit.

Under the Minaret Mountain Summit, carrying a 40 lbs (18 kg) backpack.


2 – 3 November 2013


After finishing morning shooting at 10:45am, we started to head back from the Minaret Lake. On the way downhill, the many parts of the trail were visible, but the path was still very icy and slippery. We hiked about 7 hours on 2 November, passed Devils Postpile, and camped one night somewhere on the Mammoth Pass.

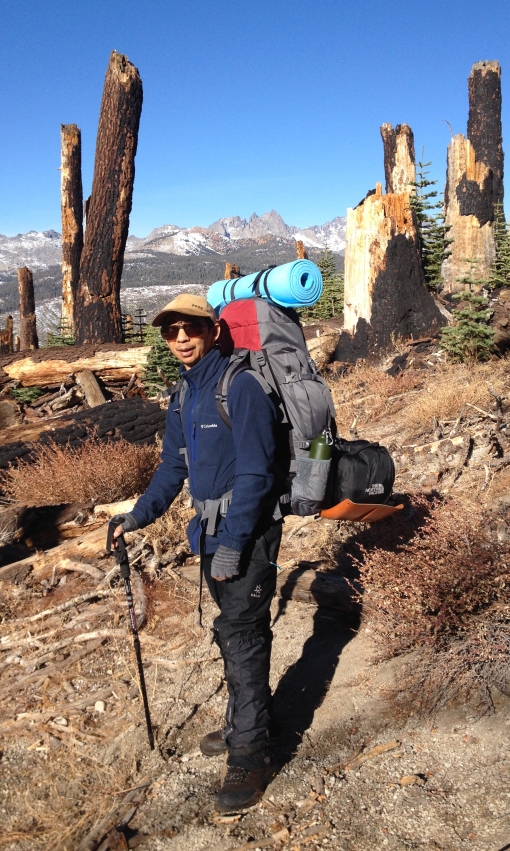
On the Mammoth Pass, the Minaret Mountain Summit was clearly visible far behind.

On the Mammoth Pass, the Minaret Mountain Summit was clearly visible far behind.


We continued our journey home at 8:00am on 3 November. The hike was then getting easier, part of the reasons was that most snows were melted and the trail became visible, though some part of the trail was still slippery. We only spent 4 and half hours to reach the Horseshoe Lake car park.

The trip finished at Horseshoe Lake park area.

The trip finished at Horseshoe Lake car park area.


What Important Things I Brought for This Trip


Tent: To prepare for this winter backpacking trip, I bought a Black Diamond 2-person 4-season HiLight Tent:

Black Diamond Tent


The tent is not cheap, but this trip proved that it was definitely a must for camping on the snow/wet ground under a cold and windy weather condition. The tent is also super light, only 2 lbs. Note that sealing all surface connections of the tent is necessary before use each time.


Sleeping bag: During my preparation, I received all sorts of different opinions about sleeping bags for winter backpacking. Eventually I bought one North Face Inferno Sleeping Bag: -20F Degree (850-fill goose down), 3 lb 6 oz. While this sleeping bag is a bit bulky and quite expensive, it was evident that this sleeping bag did excellent job for keeping me warm in those cold nights below the frozen degree. Unlike some people said, this sleeping bag was not an over kill but just right for this trip. I believe that I will take this sleeping bag with me to all my future mountainous backpacking trips to New Zealand and other places.

NF-sleepingbag


Down pant: While most people will bring down jackets for winter backpacking, we have found that down pant was equally important. During the period of making night photographs, without much movement and waiting for a long time, a warm and light down pant really helped me to concentrate on my subject.


What I Missed or Overloaded for This Trip


Hiking poles: The biggest mistake I made for this trip was that I only brought one (yet low quality) hiking pole, which, quite often, made me hard to balance when walking on an icy surface. Hiking downhill was also difficult towards my knees while a pair of hiking poles would be very useful to reduce the pressure for both knees.


Waterproof hiking boots: My leather waterproof hiking boots were supposed to be tough enough for walking on the snow surface (together with wearing waterproof gaiters) while keeping my feet dry. However, it was not the case, for two days, my boots got wet inside. Afterward, Jon told me that I should seal all boot surface connections before use, just like the tent.


Camera lenses: In this trip, I brought two lenses Nikon 14-24mm f/2.8 and 24-70mm f/2.8. It turned out that this was another big mistake – adding unnecessary weight to my backpack. I believe that one camera body plus one lens should be a rule for any backpacking photography. This time, I only used 14-24mm f/2.8 lens, and left 24-70mm f/2.8 completely untouched.


There are other essential issues associating to winter backpacking activities, such as foods, drinking water, clothes, etc., which are equally important but relatively standard, so I don’t provide detailed descriptions on these in this blog.


Finally, my photographs made from this trip are being processed, please check my website http://yanzhangphotography.com for latest update.

(1) Introduction


With a group of photographers, I undertook a photography expedition to Canadian Rockies in September 2012. During this trip, I have experienced couple of very impressive photography situations that I had not faced before. I also made couple of unique images of Canadian Rockies. In this article, I will talk about how I made one particular image:

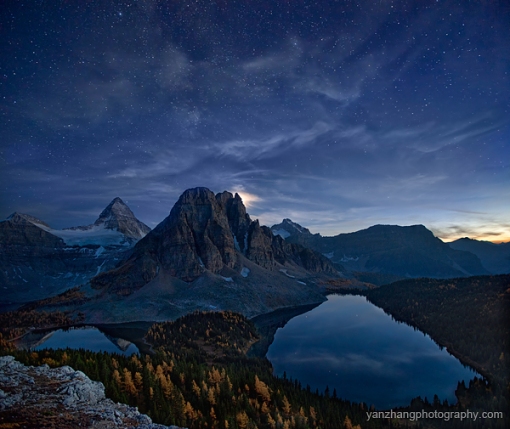
Starry Night at Mt Assiniboine

Starry Night at Mt Assiniboine


This image has become my first image published on 1X that received over 100,000 unique views. Making this image was not only of certain technical challenging, but also a good example of making modern landscape photographs with creative ideas.


(2) Planning


When I planned my recent trip to the Canadian Rockies, Mount Assiniboine was the first priority on my photography wish list. It is probably one of the most beautiful mountains I have ever seen. However, making a distinguished image of this location is challenging, not only because there have been so many stunning images of this place made by other landscape photographers, but also due to limited composition options around this area. Hence, it was my primary goal of this trip to make a photo that is significantly different from others.


Generally, it is believed that the Nub Peak is the best location to view Mount Assiniboine and its surroundings. However, many people only reach the Nublet; a platform just below the Nub Peak, as climbing to the Peak is more physically demanding. During my four days stay in Mount Assiniboine, I climbed to the Nub Peak twice, and just once stopped at the Nublet.


It is a 5 km hike one way from Mount Assiniboine Lodge to the Nub Peak. I have found that under different weather conditions, both the Nub Peak and Nublet could be good locations to make nice photographs of Mount Assiniboine; the Nub Peak gives you a higher and wider viewpoint, while the Nublet is a better location to capture some subtle details of mountain reflections in the lakes under good lighting conditions.


This image was taken from the Nublet on 21st September 2012.


It was a clear yet featureless afternoon, but we still decided to go to the Nublet to try our luck, as we had very limited time in the Mount Assiniboine area. After arriving at the Nublet before sunset, I carefully composed the frame and specifically considered to include Lake Magog and Sunburst Lake into the frame to ensure some reflections. Sunburst Lake would be used to show some clouds and stars reflecting from the dark sky. After sunset, the sky started to dance and the moonrise added a unique feature to the sky. I knew my chance would finally arrive.


(3) Taking Shots


This image was made with my Canon 5D Mark II camera and 16-35mm f/2.8L II lens. I used my light Benro C2980T tripod and B2 ball-head to support the camera and lens with an RC-1 canon remote release to trigger the shutter.


In order to make a fine night image with this composition, I made a number of master shots before the sky got completely dark, so that the mountains, golden trees and foreground rocks could be clearly revealed in full of detail. Then I selected one of these shots as a Master Copy for processing later.


First shot (master copy):
16mm, ISO 100, f/7.1, 30 seconds, 2-stop soft GND filter.


After 30 minutes, the sky became very dark, while the moon had moved right behind the peak of Mount Assiniboine. I started to shoot again, mainly focused on the sky and its reflection in Sunburst Lake. The following second shot was then used from one of many shots during that time.


Second shot:
16mm, ISO 1600, f/2.8, 8 seconds, no filter.


The second shot remained the same composition as the mater copy (first shot), but with a higher ISO (1600) and the biggest aperture, which revealed more stars in the sky but still retained the digital noise under control.


After about 30 minutes many more stars appeared in the dramatic sky, so I decided to make one more final shot. But this time, I carefully tilted up my camera so that 2/3 of the fame filled with the beautiful starry sky.


The final shot:
16mm, ISO 3200, f/4, 20 seconds, no filter.


(4) Processing


The process was undertaken in two stages. The first stage was to blend the Master Copy with the second shot together (note that these two shots had exactly the same composition).


I opened the raw files of these two shots via Camera Raw 6.7, made a correct White Balance adjustment so that the colour for these two images became consistent. I also made a small adjustment for both files by increasing both Clarity and Vibrancy to 12. I then loaded them into Photoshop CS5.


In Photoshop CS5, I carefully blended the two images together to form an intermediate image that remained the Master Copy every detail except the parts of the sky (including moonlight) and Sunburst Lake which were from the second shot. After this stage, the intermediate image was a beautiful picture in its own right.


Then the second stage was to integrate the third shot (starry sky) with the intermediate image. After doing a small adjustment on the raw file in Camera Raw 6.7 for the third shot by just increasing Clarity and Vibrancy to 12, I loaded the raw file to Photoshop CS5, where the intermediate image was already opened. I first extended a sufficient large Canvas for the intermediate image, and then added the third shot on the top of it. By matching the two images with respect to the mountain ridges, I then carefully painted the upper part of the sky from the third shot into the intermediate image. Finally I cropped the image to produce a square-framed picture and saved it as a PSD file.


After producing this square-framed PSD file, the following process is quite standard. But one specific technique I used was so called TK mask luminosity. By applying this technique, I was able to adjust pixel brightness at different levels to achieve certain balance that I wanted.


(5) The Outcome


I was quite satisfied with the final effect after such tedious processing. Specifically, the square framed image represents a vast view of Mount Assiniboine, while the dramatic starry sky illustrated beautiful and mysterious mountain scenery that I have never experienced before. � This is also the first image I published on 1x attracting more than 100,000 unique views within three months.


It was a memorable day and was lucky to witness such an amazing night over Mount Assiniboine. This image was also the most unique work I made from my entire trip in the Canadian Rockies.


(6) Three Hints


As a landscape photographer, I believe the following three things are important to produce a high quality landscape image:


– Exploring the location thoroughly before setting up your tripod. As Mount Assiniboine was a new place for me to photograph, getting familiar with the location was very important to identify a good viewpoint. In that afternoon, we arrived at the Nublet around 4.00pm, so we had plenty of time to explore the surrounding area before starting to shoot.


– Composing in square frame sometimes is a key to make a successful picture, especially for capturing full details of foreground, middle ground and background. Making a square composition is also more challenging, that needs more careful planning for the overall procedure for shooting and post processing.


– For sunset shooting, waiting a bit longer is useful even if the best light has passed. Very often, we could not get great sunset light, but the night sky could be magnificent, just like this image. In this case, we waited longer until darkness fell.

I have written a few blogs on this topic. Since I have received more inquiries about Li River photography in last a few months, I decided to write this article to provide more detailed information on the locations, times, and transportation in relation to making pictures of Li River. Some contents may be similar to my previous blogs.

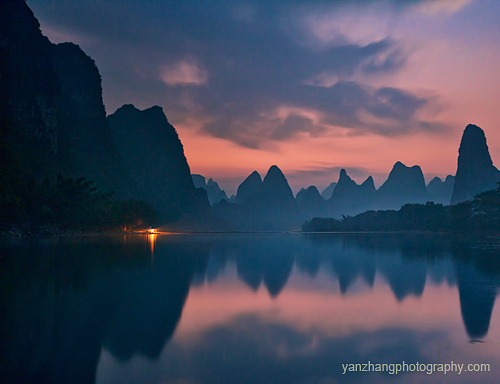
For many years, Li River has been viewed as an iconic symbol of oriental beauty. It is one of those a few places of China that is so popular by attracting lots of tourists every year but still remains its natural purity. When I first visited Li River in 2006, I was convinced that it is a place I should come back constantly. Since then I have been to the region of Li River five times in last a few years.

During my Li River photography experiences, I have been lucky enough to be able to make some nice photos of Li River, which have won some prizes, and quite a few of prints have been sold to various clients.

lr-1-blog-2013

In this article, I would like to share some of my photography experience with people who are interested in doing landscape photography around Li River.

(1) Photography locations – getting there

There are several places that people should remember if they plan to do photography in Li River area. Firstly, Guilin (桂林) – one of the two major cities in Guangxi (广西) Province, is the first destination for most people coming from either overseas or other places in Mainland China. It has an international airport that connects Guilin to the rest of the world without many difficulties.

Then the best location for Li River photography is actually a small county called Xing Ping (兴坪),where your real Li River photography journey starts.

There are two major ways to get to Xing Ping from Guilin: by bus or by taxi, both take about 2 hours. I never took bus to go to Xing Ping, as it usually quite crowded and uncomfortable. More importantly, you would have difficulty to carry all your luggage and camera gears onto the bus. So I usually took private taxi to go to Xing Ping, it costs Chinese Yuan RMB from 300 to 500 (equivalently, USD$50 – USD$90) depending on how good you are to bargain with the driver.

Shooting along the river

Once you get to Xing Ping, you will be amazed with the beauty of Li River. Xing Ping is such a place from where you can easily access to many excellent photography locations along Li River. In the following I list four well-known photography locations. But people should keep in mind that they should free themselves to identify some new points on their own discovery.

Both Luo Si Mountain (螺丝山) and Yuan Bao Mountain (元宝) are just 10-20 minutes by boat from Xing Ping, and are ideal places for taking sunset pictures.

Huang Bu Reflection (黄布倒影)is another well known place in Li River, which is 40-50 minutes by boat from Xing Ping. It is a perfect location for sunrise shot, especially for a clam day, as the mountain reflection will be stunning during a good sunrise time.

Finally, Xia Long (下龙) is an excellent location along Li River, and it takes 60 minutes by boat to get there. Most people take sunrise shoots at this spot, but I have found it could be also interesting to take late afternoon or evening shoot. The following image was taken in this location (early morning).

lr2-2013-blog

One thing that photographers should remember is that in general Li River is a busy river channel for local people for their business and daily life. The scenes only become attractive when the river is in a calm and peaceful mood. So for morning shooting, people should get to the location pretty early.

Shooting from the mountains

While taking pictures along Li River is quite convenient and thus is the major photography way for most photographers, making Li River images from the top of surrounding mountains, on the other hand, is much more challenging and also more fruitful sometimes. For the majority of local photographers, as far as I know, they probably are more preferable to take Li River photos from the top of mountains, as that will give you very wide perspective of the whole Li River and surrounding scenery.

However, taking Li River pictures from the mountains demands some physical fitness for photographers. For sunrise shooting, for instance, you will need to get up quite early, taking 40 – 60 minutes boat to get to the mountain area, and then spending another 40 – 120 minutes (depending on which mountain you want to get there) to climb the mountain in the darkness. For most mountains, there are no trails for hiking at all. People will have to use their two hands to climb from time to time.

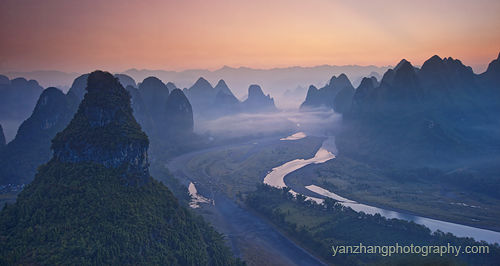
The following image was taken from a mountain near Li River.

lr3-2013-blog


(2) Having a local guide is essential

For most photographers from outside Li River region, having a local guide is important in order to access those photographic spots either along Li River or on the mountains. A good local guide will take you to the right spots at right time. I would suggest not to choose those general fishermen as your guides because they usually have little photography knowledge that may result in missing some important photography opportunities.

(3) Good seasons and times for Li River photography

There are good seasons and bad seasons for Li River photography. Local people told me that in general, April and May are preferable for Li River photography, because during these months, water level in Li River is relative high, and it has less foggy weather. From June to August, there are usually have heavy rains and floods around Li River. Weather during September and October is usually quite nice from a photography viewpoint, but water level in Li River during these months is pretty low, which may result in a less impressive effect if you take pictures from the mountains. Then from November to next year March, I was told that foggy weather is too often around Li River region.

Nevertheless, I should indicate that all such weather and time information is not absolute. Exceptions always exist. In fact, during my several years Li River photography experience, I have never been able to travel to Li River during April and May, but I still made some nice images of Li River, as the above three links show.

One thing is important: rains play a critical role to generate dramatic weather conditions for Li River region. Generally, if there is a change between raining and sunny weather, for example, having 2 or 3 days rains and then turning to sunny days, then dramatic sunrise or sunset will likely occur in the third or fourth sunny days after the rain.

(4) A final word

I have a passion for Li River. My journey of Li River photography will continue. If you like to know more information about photography in this region, please feel free to contact me through my photography website:

http://yanzhangphotography.com


Aoraki/Mount Cook is the highest mountain in New Zealand and Australia combined, reaching 3,754 metres. Probably it is also the most famous landmark of New Zealand, a place for so many photographers and artists to produce great works.

I went to Mount Cook in 2011 and made one of my best images there. Personally I will never be tied of going to this wonderful place and taking photographs. Mount Cook was identified as one major focus and also the second location in our this journey. Our plan was to stay three nights in Mount Cook, so that we would have sufficient opportunities to explore the area and take both sunrise and sunset photographs.

We left Queenstown in the morning of 28 August 2012, and would expect to arrive Mount Cook around lunch time. Nevertheless, this day turned to be the longest day for our entire trip. We made a careless mistake and drove all the way down to West Coast. By the time we found out, we had to drove another six hours to get back to Mount Cook. Fortunately, things were not too bad, in fact with some extra time, we enjoyed the wonderful scenery along the road so much. We arrived in Mount Cook after 6pm, and directly headed to Tasman River for night photography.

Crystal Giants

This photo was taken on the first night we spent in Mount Cook, it showed a special night in Tasman River, Mount Cook: these icebergs floated on the river surface while the moonlight shedding on them illuminated such beautiful color.

Hooker Lake

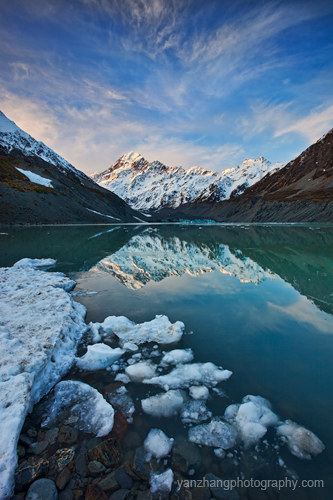
To make photographs in Mount Cook, it is hardly not to go to Hooker Lake, which probably is the closest ground location to view the peak of Mount Cook without doing a serious mountain climbing, though hiking three hours for this trip may not be an easy task for everyone. The lake looks not very big, but its one side ends with giant glaciers directly connecting to Mount Cook. On a clear and calm day, the reflection of Mount Cook in the lake provides an interesting highlight of this scenery.

We three photographers went to Hooker Lake on 29 August 2012. The sunset light was pretty flat with a cloudless sky. We were a bit disappointment for such a result after spending more than five hours on this trip. The next day, without knowing what the weather would be in late afternoon, I and another photographer decided to try our luck one more time. On 30 August 2012, after lunch time we hiked 90 minutes to arrive in Hooker Lake again, and patiently waited for our last chance. Finally, we witnessed that the peak of Mount Cook was lighten by the setting sun while beautiful clouds were moving across the sky. This photo recorded what we got on that day.

New Zealand has been my dream land for many years. Since I had my first photography experience in New Zealand in 2011 (see my blog “Making the Image “Moonlight”), I have planned to return to New Zealand at least once a year to fulfill my photography dreams. In August 2012, after a long time preparation, I finally returned to this beautiful land with several other photographers.


Our first stop was Queenstown – a town in Otago in the South Island of New Zealand. Although this was my second time to this small town and we mainly traveled along the previous paths that I had in 2011, there were still plenty of new and exciting photography experiences during our four days stay in Queenstown, and one such experience was shooting at Kawarau River.


Kawarau River is well known as the site of the world’s first commercial bungy jump. The river starts from Lake Wakatipu, and flows generally eastwards for about 60 km until it reaches Lake Dunstan near Cromwell. We stayed in a hotel just at the west end of Kawarau River connecting to Lake Wakatipu. One our team member found a position on a cliff above the river that provided a nice viewpoint of the river with the snowing mountains background. The scene was just magnificent!

I had two chances to make photographs at this location, both in early morning. For the first time, the sunrise light was wonderful, but its direction was not quite right and I did not want to comprise the composition. On the day we were leaving Queenstown, I decided to take the last chance. I went up before 5am, and came to this place in the darkness. It was surprising that the Milky Way was still clearly hung on the sky and the twilight was about to illuminate the surroundings, while two strips of red clouds were just across in the sky. This was my first to witness such a wonderful Milky Way when the sky started to change its colors.


Karawau River


I took a number of shots with ISO 1600 to focus on the sky that captured such beautiful Milky Way and clouds. But the foreground river and the right side mountains were completely under exposed. As I did want to have the river as the foreground in my final image, I had to wait until the sky was bright enough so that I could make proper shoots to capture the river and mountain details. Furthermore, the composition had to also be changed by lowering my camera body down slightly so that the frame contained all interesting elements around the river.

The post process was not too difficult. The final image was from combining three shots together – each with different exposure times: one focusing on the Milky Way (ISO 1600), one focusing on the right side mountains details, and one focusing on the river. The last two shots had the same composition containing a small portion of the sky. The blend was made in two steps. Firstly, the last two shots were blended together to reveal sufficient details of the mountains as well as river. Then this blended image was stitched with the first shot so that a square frame was finally produced to contain both sufficient sky and foreground.

As a final note, this image probably not only shows a very unique viewpoint of Kawarau River, but also presents a very special moment at this place.

For many years, Li River has been viewed as an iconic symbol of oriental beauty. It is one of those a few places of China that is so popular by attracting lots of tourists every year but still remains its natural purity.


Li River Sunrise

Li River Sunrise

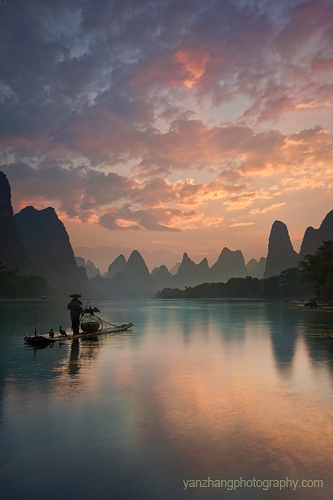
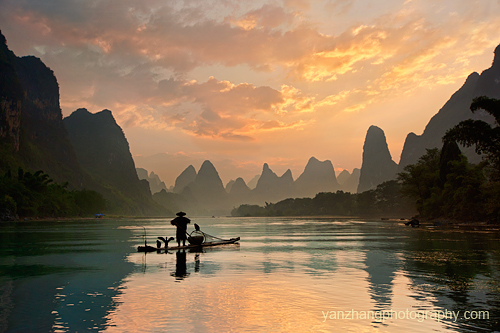
This photo was taken in Xingping County along Li River on 11 October 2011. The local photographer said that it was not an ideal time to make pictures of Li River from October to April of the next year because an overcast weather over Li River was very common during this period. But there was an exception this time. I was told that it had been continuously raining for an entire week but just stopped on that day when I arrived in Xingping. Then I knew I probably would be lucky enough to witness some beautiful sunrise and sunset moments during my this trip. Indeed, on the third day, I encountered a spectacular sunrise over the beautiful Li River.

The image was taken with my Canon 5D Mark II camera and 16-35mm f/2.8L II lens. I used tripod Gitzo GT2531EX CF6X Explorer 2 (BH-55 Ballhead) to support the camera and lens, and a RC-1 canon remote release to trigger the shutter.

To balance the light between the sky and foreground (river), a Lee .6 GND soft filter and a Lee .3 GND hard were used. I found that this filter combination provided the best effect without causing any visible grey line between the water and mountains.

This image was also a result from blending three successive shots within 15 minutes. When the sky was getting to dance, I made a shot with aperture f/22, focal length 29mm, ISO 50 and shutter speed 20 seconds. This long exposure made the river have a peaceful and tranquil feeling, where the cloud reflection was also showed in the water. Soon after this shot, I found the clouds became even more dramatic, so I made the second shot focusing on the sky with aperture f/10, focal length 29mm, ISO 100 and shutter speed 1.3 second. Then a few minutes later, something interesting happened: a fisherman suddenly rowed into my frame – this was completely out of my expectation! I quickly made the third shot: aperture f/8.0, focal length 29mm, ISO 100 and shutter speed 1/13 second.

The first two shots were well planned, but the third shot was by chance, which eventually played the most significant role to produce the final image.

I opened three images raw files in Camera Raw 6.3, made a small adjustment for each of these files by just filling a bit light for the first two images increasing both clarity and vibrance to 12. Then I loaded them into Photoshop CS5.

In Photoshop CS5, I first blended the first two images together: the intermediate resulting image combined the first image’s water reflection (lower part) and the rest parts of the second image. Then I further blended this intermediate resulting image with the third image by carefully painting the fisherman and the associated water reflection into the earlier combined image. In this step, localizing the fisherman and his reflection was critical. Paint opacity should be not more than 5%, and gradually painting was carried on until the fisherman (reflection) smoothly appearing and merged with the rest part of the image.

After three images were carefully merged, a standard Photoshop processing was carried out. As an additional yet important stage, I further applied Tony Kuper’s mask luminosity technique to select “Expended Mid-tones Pixels” in Channels, and then select Curve to create a Curve layer. By adjusting this curve I could further enhance the contrast on expended mid-tones pixels, which made the overall image pop out nicely.

I was satisfied with the final image after processing. I think blending three images together was an important step to make an image illustrating such a beautiful scene of Li River that I have had in my mind for a long time.

On that day early morning, I traveled by a small boat for one hour to get to this location when the sky was still very dark, so I had plenty of time to set up my tripod and considered various compositions. From the dawn to sunrise, the light changed dramatically, and also local people started to work on their boats in the river. Under this situation, the first shot was critical to capture the stillness of the water when no one was there. To me, the impressive sky and its reflection in the water were the primary feature I wanted to capture, while the unexpected fisherman captured in the third shot just added an exceptional highlight to this image.

Overall, I believe that the following three things are important to make a good landscape photograph:

– Persistence. If you find a wonderful place to photograph, you probably have to visit there many times. In the last five years, I visited Xingping four times, and went to this specific location seven times. Only this last time I got the wonderful light. Visiting Li River also meant that I have to travel far enough each time (from Australia to China).

– Patience. In that morning, I thought I already made the best photos after the first two shots, while two photographers nearby started to move to another location. Luckily, I stood there a bit longer without moving my tripod, so that I could capture the third image with the fisherman coming to the right spot with the same composition.

– Always try different compositions if you have time. I believe that this is quite critical to achieve the best outcome. In that morning, after I made these three shots, I also took several landscape-oriented shots. It appeared to me that both compositions were equally impressive.

Visit Yan Zhang Photography for more images.


A professional photographer once told me that he saw the world in square: he used his medium DSLR camera to produce his square-framed photography works; and even if he used a 35mm full frame DSLR in shooting fields occasionally, he had to compose the scene in square in his mind. At that time, I didn’t really understand why the experienced photographer dedicated to such square ratio photographs. Since late 2011, I started to spend more time on making seascape photographs, and gradually realized that the traditional 2:3 ratio for a 35mm full frame DSLR camera indeed had some limitations from time to time.

Waking Up

Waking Up

One obvious problem with 2:3 ratio full frame DSLR camera is that it is just not sufficient to capture a big scene that you are interested. It is just like that you want to make a panorama photograph representing a wide landscape scenery, by cropping a single shot to a panorama ratio does not work at all. Another technical issue is the restriction of such 2:3 ratio. If there are both foreground and background elements that we want to stress in one frame, then quite often we probably need the same part or almost the same part of the space to represent them. A more complicated case is that there are foreground, middle ground and background that we want to give certain focuses on each of these parts. A situation like this often appears when we make mountainous pictures. In my view, a large square frame is a more rational option to handle these shooting circumstances.

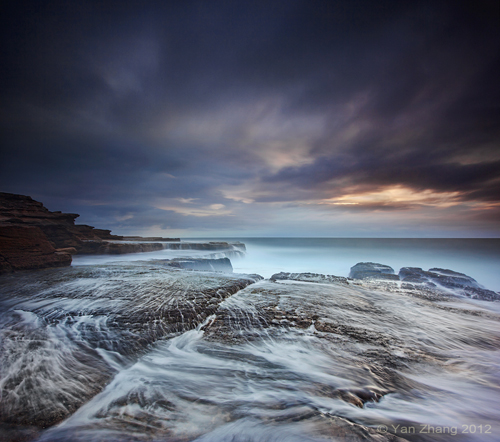
The above photograph Waking Up is an example that I use this approach for seascape photography. This image was made through several successive shots in Sydney east coast in an early morning. Firstly, I focused on the foreground rock surface. It was a low tide period, waves were just washing on the rock bed surface that caused interesting wave traces. I took more than 50 shots in order to capture those interesting wave traces. When the sky started to change, I carefully tilted my camera up so that the frame covered about half sky and half water. By using a 3 f-stop ND, I was able to shoot using a relatively slower shutter speed, because I wanted the water far away to be smooth. Finally, I tilted my camera further towards the sky, with a proper shutter speed to shoot the dramatically changing clouds. The finally image was a result by stitching and blending these three shots together in Photoshop CS5. By the way, I prefer to do photo stitch manually, instead of using Photoshop photo merge function, as this gives me more flexibilities to make the final image.


Visit my photography homepage for more images.